
Are you looking for a way to access your Gmail messages from any device? If so, you need to enable IMAP settings for your account. IMAP stands for Internet Message Access Protocol, and it allows you to read, send, and manage your Gmail messages from any email client. In this blog post, I will show you how to enable IMAP settings for your Gmail account in just a few simple steps.
Let’s walk through the steps to get this done effortlessly.
Table of content
1. Enable IMAP setting in your Gmail account
1.1 IMAP Settings
2. Enabling IMAP for less secure apps.
2.1 IMAP for Gsuite account (example@safemailerapp.com)
2.1.1 IMAP settings for Gsuite account.
2.2 IMAP for Gmail account (example@gmail.com)
2.2.1 IMAP settings for Gmail account.
3. Benefits of enabling IMAP settings
Enable IMAP setting in your Gmail account
Step 1: Open Gmail and Sign In
First things first, head over to the Gmail website (gmail.com) and log in to your account. Make sure you’re using the account you want to enable IMAP for.
Step 2: Go to Settings
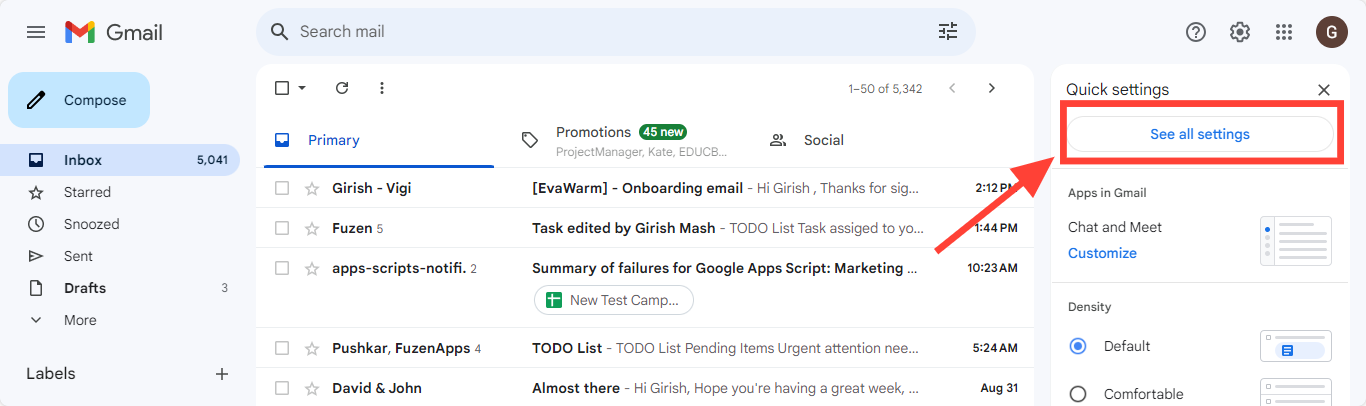
Once you’re in, spot the gear icon in the upper-right corner of the screen.

Click on it, and a drop-down menu will appear. From there, select “See all settings.”
Step 3: Navigate to Forwarding and POP/IMAP
In the settings menu, you’ll see a few tabs. Click on “Forwarding and POP/IMAP.” This is where the magic happens.
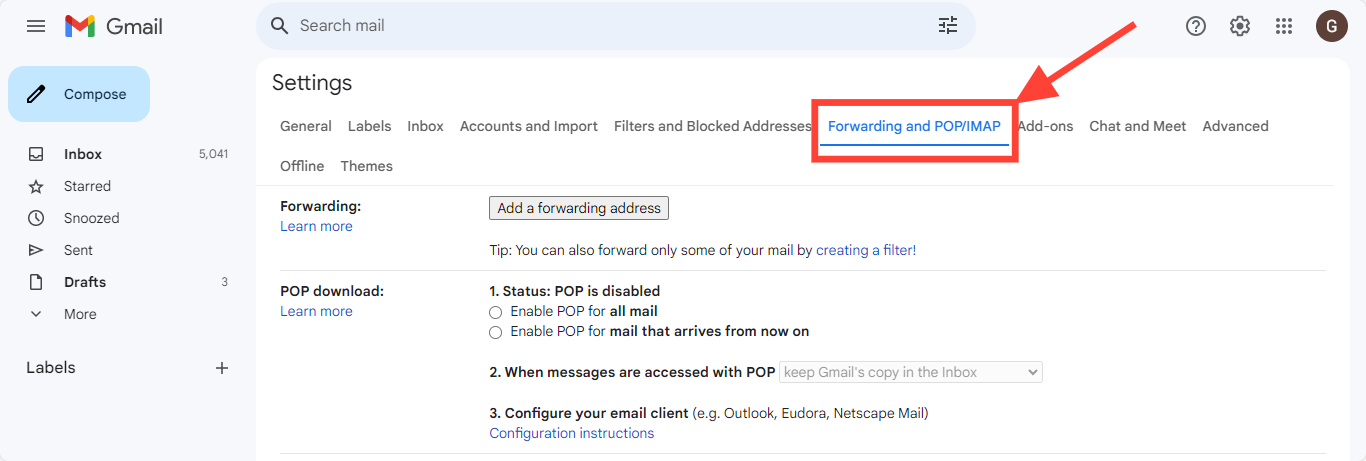
Step 4: Enable IMAP
Scroll down a bit, and you’ll find the “IMAP Access” section. Click on the radio button next to “Enable IMAP.” This action tells Gmail that you want to use IMAP to access your emails.

Step 5: Save Changes
Scroll to the bottom of the page and hit the “Save Changes” button. Your Gmail account is now IMAP-ready!
Step 6: Configure Your Email Client
Now that IMAP is enabled, it’s time to set up your email client and softwares (like Outlook, SafeMailer, or Apple Mail) to work with Gmail using IMAP.
IMAP Settings
When you add your Gmail account to your email client, make sure to use the correct IMAP settings. The IMAP settings for Gmail are:
- Incoming server: imap.gmail.com
- Port: 993
- Security: SSL/TLS
- Username: Your Gmail email address
- Password: Your Gmail password
Enabling IMAP for less secure apps.
Now, let’s address enabling IMAP for less secure apps. These are typically apps or devices that may not meet Google’s strict security standards. But this doesn’t actually mean that these apps are not secure.
IMAP for Gsuite account
(example@safemailerapp.com)
Once you have enabled IMAP from your Gmail settings page, the next step is to enable access to less secure apps.
Let’s see how this is done.
Step 1: Open your google account and login
The very first step is to log in to your google account. Make sure you use the Gsuite account in which you want to enable IMAP.
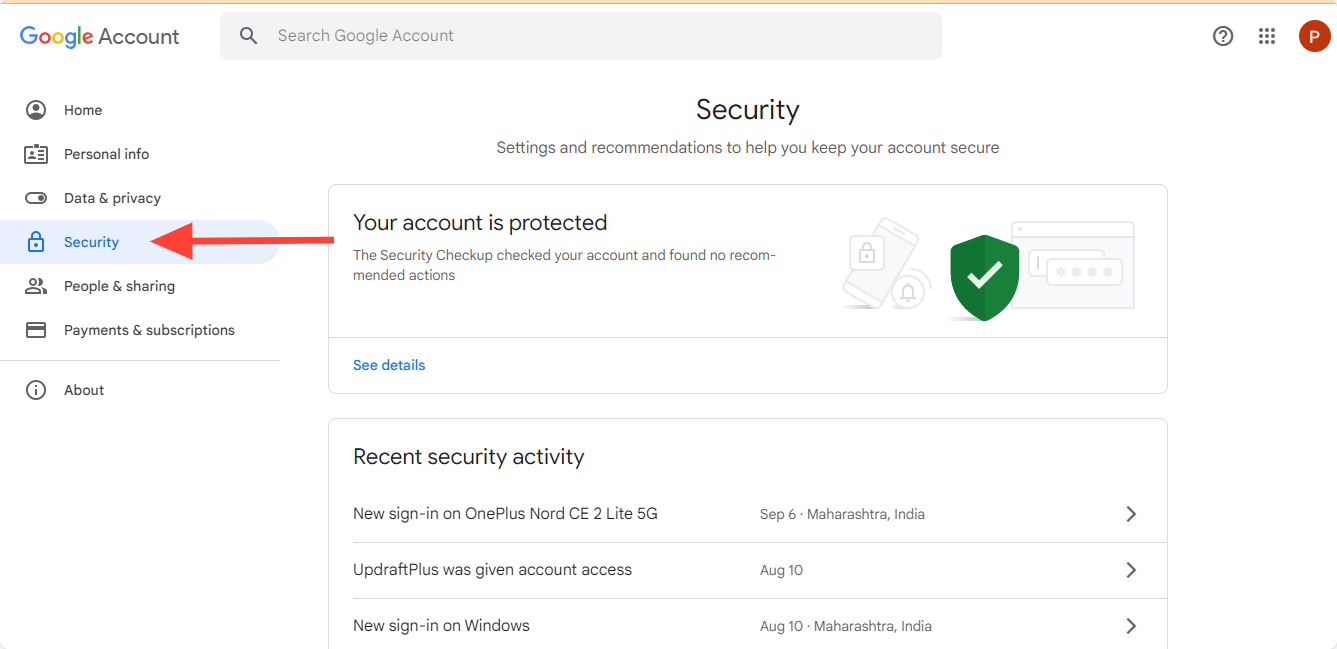
Step 2: Go to Google Account Settings
Now go to your google account settings (use: https://myaccount.google.com/ ). Here you will find the “Security” option. Please click on it.
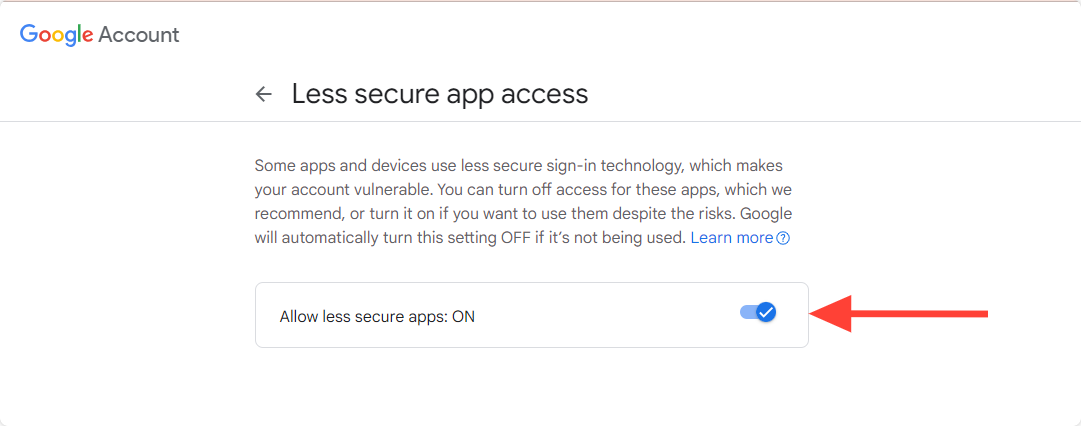
Step 3: Go to the “Less secure apps”
Scroll down and go to the Less secure apps section in Security Tab. If it shows “on” then you have already enabled access to less sure apps before.

Step 4: Enable access to less secure apps
To enable access to less secure apps, click on the card mentioned above and click on the toggle button to enable access.
IMAP settings for Gsuite account.
The IMAP settings for GSuite are:
- Incoming server: imap.gmail.com
- Port: 993
- Security: SSL/TLS
- Username: Your Gmail email address
- Password: Your Gmail password
IMAP for Gmail account
(example@gmail.com)
The settings to enable IMAP for Gmail accounts are different from G Suite accounts. This is because from May 30, 2022, Google no longer supports the use of third-party apps or devices which ask you to sign in to your Google Account using only your username and password.

Even though google has disabled the option to enable access to less secure apps, there is another way through which you set up your Gmail IMAP. Let’s find out how it can be done.
Step 1: Open your google account and login
The very first step is to log in to your google account. Make sure you use the Gmail account in which you want to enable IMAP.
Step 2: Go to Google Account Settings
Now go to your google account settings (use: https://myaccount.google.com/ ). Here you will find the “Security” option. Please click on it.
Step 3: Go to the “How you sign in to Google”
In the security page, scroll down to “How you sign in to Google” section. Check here if you have enabled 2-Step Verification.
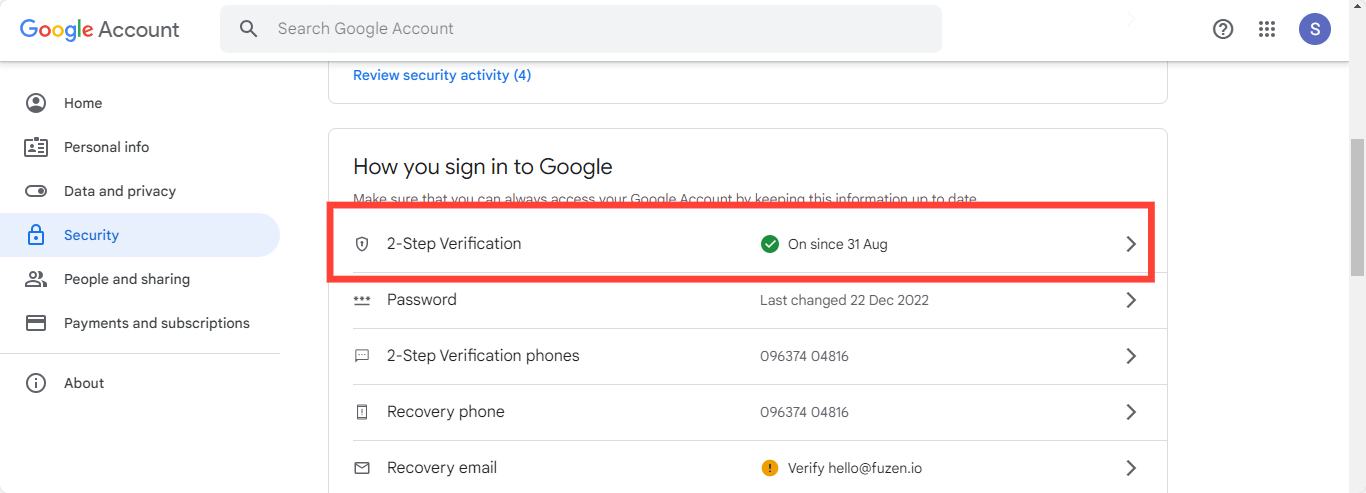
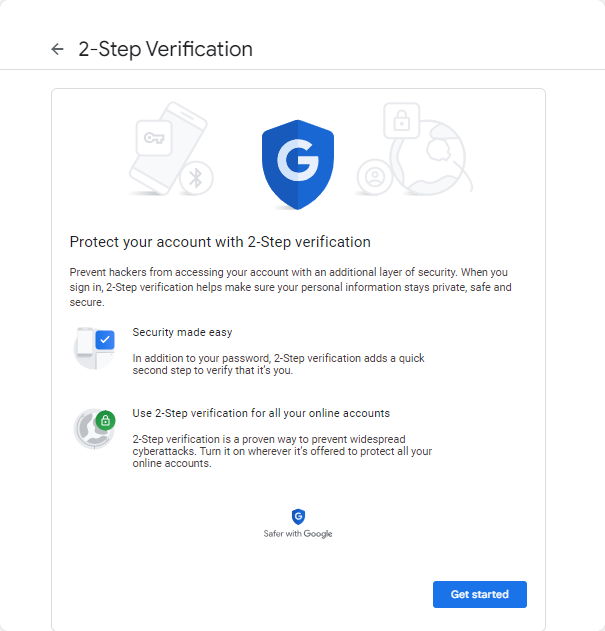
Step 4: Enable 2-Step Verification
It is mandatory to enable 2-Step verification to set up IMAP for your Gmail account. To enable 2-Step verification, click on the highlighted option above and enter all the necessary details.
Step 5: Generate Password
Once you have enabled 2-Step verification, the last step is to generate a password. click on For this “2-Step Verification” and scroll down to the “App Passwords” section.
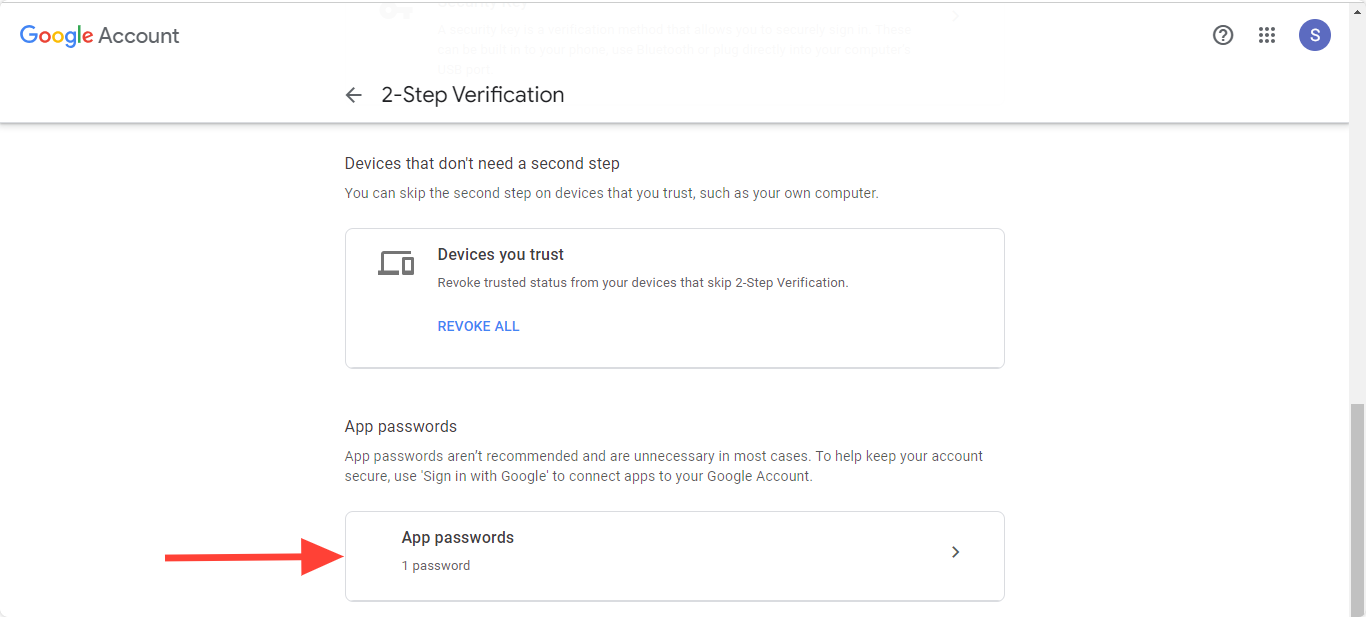
Click on the arrow ( > ) in the App passwords section.
In the App passwords page, Select the app and device for which you want to generate the app password.
Select “Mail” in the select app dropdown and then select your device.

Then click on “Generate”.
A 16 character password will be generated. Please copy and save this password as it will be used setting up Gmail IMAP.
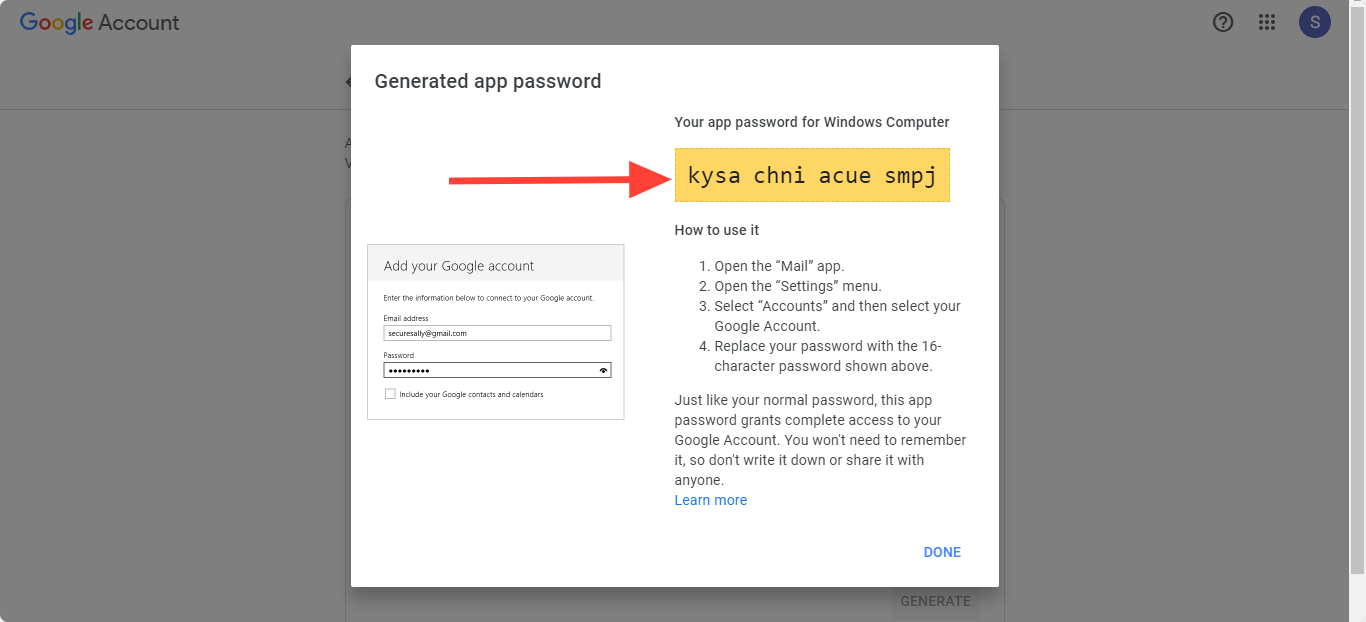
This generated password will be used instead of your email account password while setting up the IMAP.
IMAP settings for Gmail account.
The IMAP settings for GSuite are:
Incoming server: imap.gmail.com
Port: 993
Security: SSL/TLS
Username: Your Gmail email address
Password: Generated Password
Benefits of enabling IMAP settings
Here are some of the benefits of enabling IMAP settings for your Gmail account:
- You can access your Gmail messages from any device, including your computer, smartphone, and tablet.
- You can keep your Gmail messages synchronized across all of your devices. This means that any changes you make to your messages, such as deleting or marking them as read, will be reflected on all of your devices.
- You can use your favorite email client and email marketing software like SafeMailer to manage your Gmail messages. This gives you more flexibility and control over your email.
If you are not using IMAP settings for your Gmail account, I recommend enabling them. It is a simple way to give you more flexibility and control over your email.
I hope this blog post was helpful. I know that enabling IMAP settings can be a bit confusing, so I tried to break it down into simple steps. If you have any questions, please feel free to leave a comment below. And if you found this post helpful, please share it with your friends and colleagues.
Leave a Reply