Go to the Email Campaigns Dashboard from your cold email automation app and click on “Create New Email Campaign”. You will be taken to a form to launch a new email campaign.
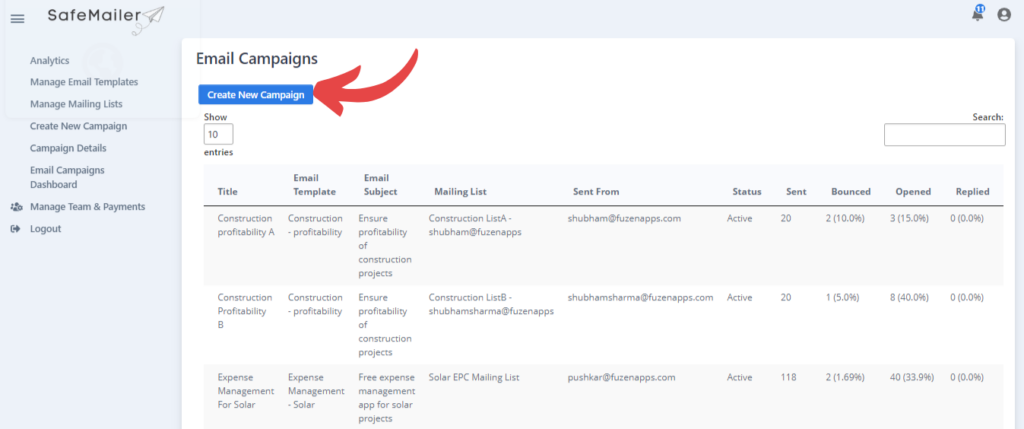
You can launch a new email campaign in 3 easy steps.
First, click on the “use a template” toggle button to select an email template to be used for this campaign and enter the display name.
Please note, your email subject can also be personalized similar to the main email text.
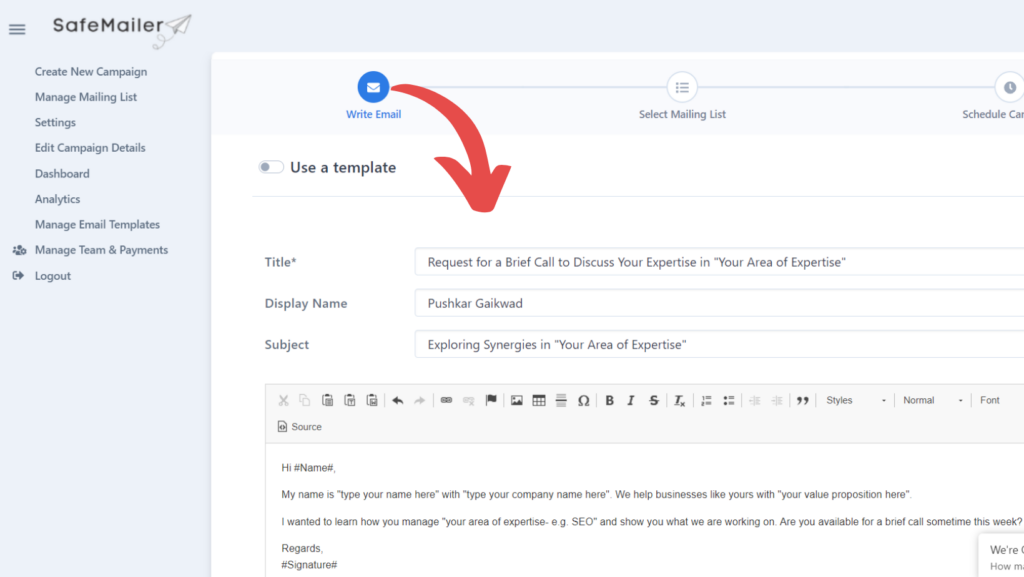
You will be able to preview the email text from the selected template.
A/B testing #
If you want to run an A/B test to see which subject line works best, you can easily do it by clicking on Enable A/B test.
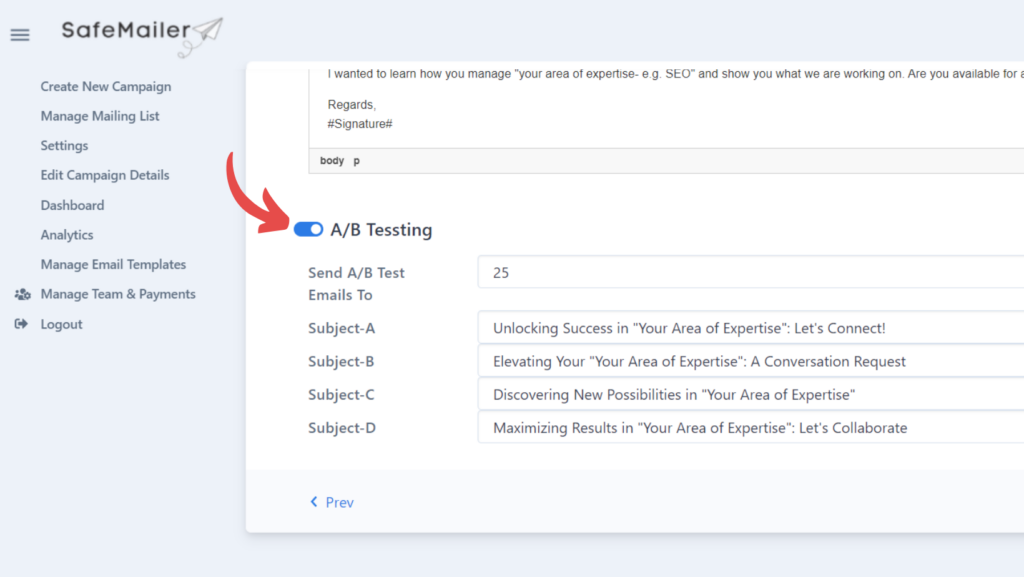
Then enter the number of emails for which you want to run the A/B test for in “Send A/B Test Emails To”. You can enter multiple subject lines next. You can run an A/B test for up to 4 subject lines.
If you don’t want to run a A/B test, simply ignore this section.
If the email content looks satisfactory, then scroll down and click on the ‘Next’ button to go to the next step of selecting a mailing list.
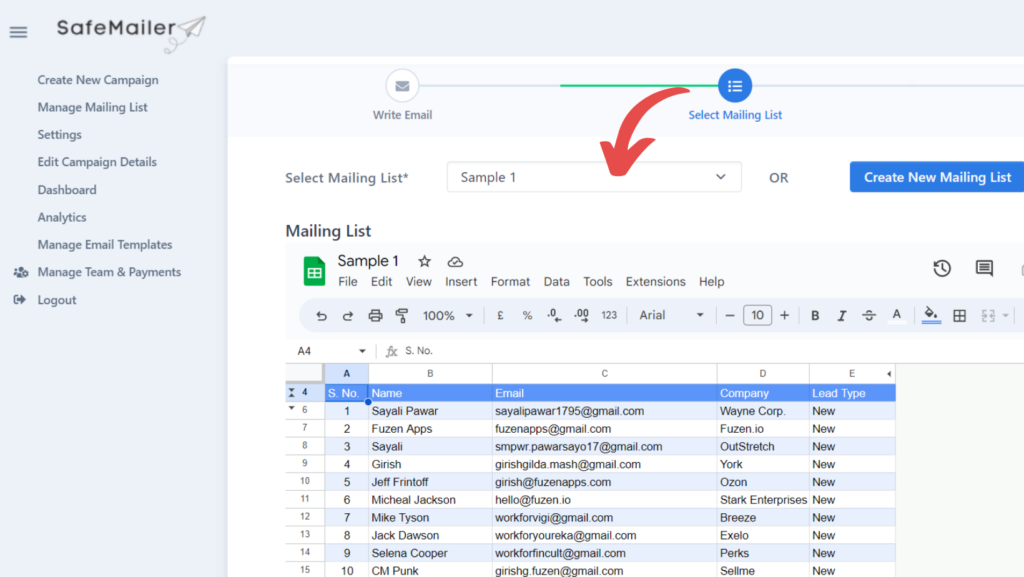
You can directly add or remove recipients in the spreadsheet itself.
When the mailing list is finalized, click the ‘Next’ button at the bottom.
The final step is to define a schedule and a daily number of emails for your campaign. You can select the days and times when your emails should be sent, specify the applicable time zone, and finally put a cap on how many emails should be sent every day.
Please note that, you should start with a low daily number of emails for a new sender address and then you can gradually increase it as your sender reputation builds up over time.
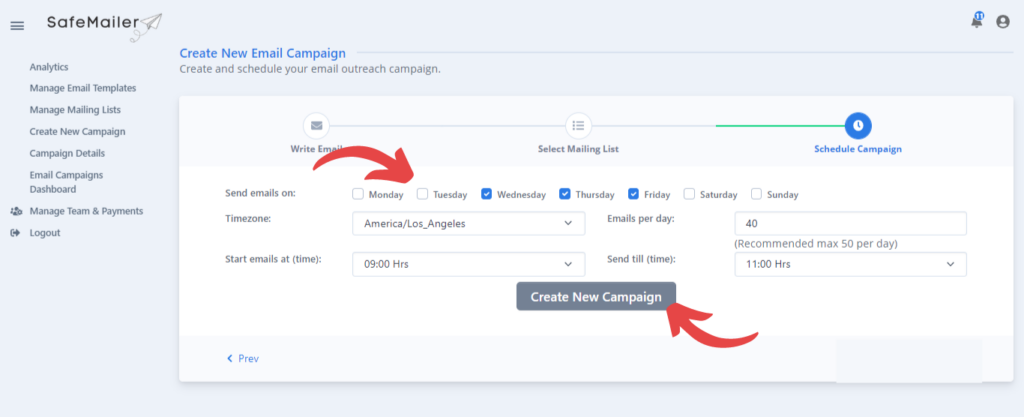
Click on the button “Create New Campaign” bottom to create and schedule your new email campaign.


