
SafeMailer’s drip email automation app turns your email account into a highly productive email marketing platform.
It works as a mail merge tool, combined with the campaign schedule. You can create nice-looking email templates using an easy-to-use HTML editor as well add multiple leads and assign sequences
SafeMailer’s automation workflows connect these tools with your email account to send out automated sequence emails that will achieve a very high opening rate.
Now, let’s go through the first steps to setting up your drip email automation app.
Getting started
First, go to the SafeMailer Drip email automation page (i.e. https://safemailer.app/free-drip-email-campaign-software/) and then click on “Sign In With Google”button as shown in the image below.

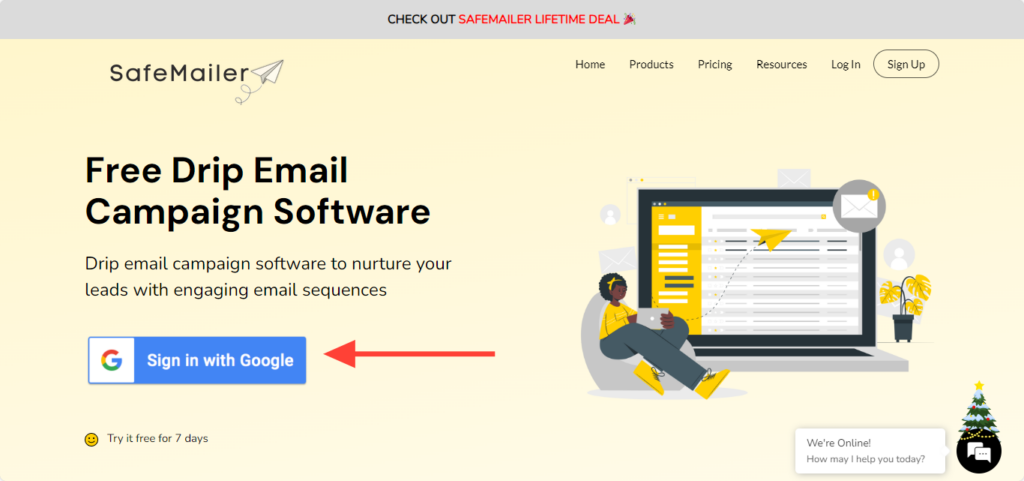
SafeMailer offers a forever free version for up to 100 new recepients/month. You can click on the ‘Sign In With Google’ button to begin your drip email automation journey. Afterward, you can upgrade it to a paid plan as per your business requirements.
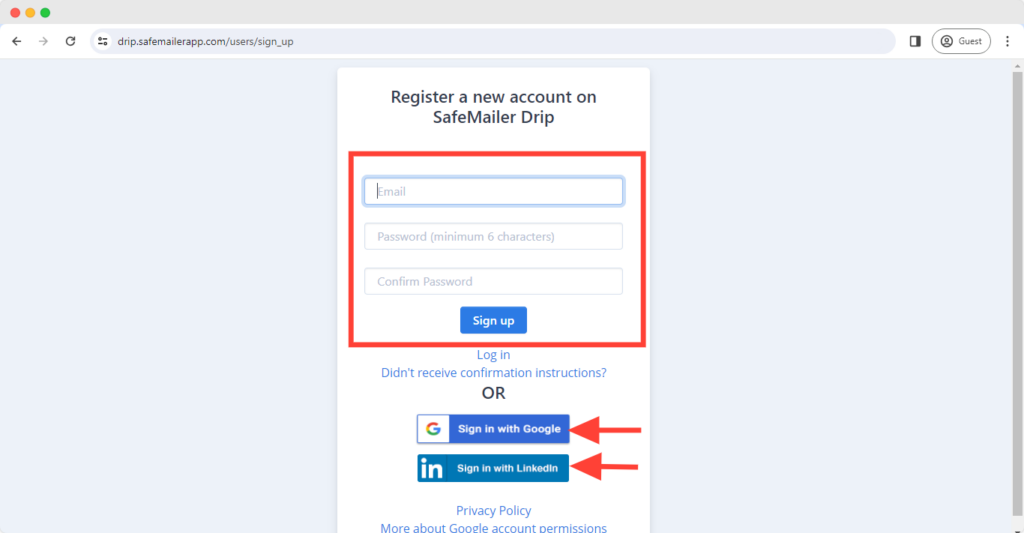
When you click on the ‘Sign In With Google’ button, you will be redirected to the following window. SafeMailer will ask you to sign up with your Google or LinkedIn account or using your email Id and password.
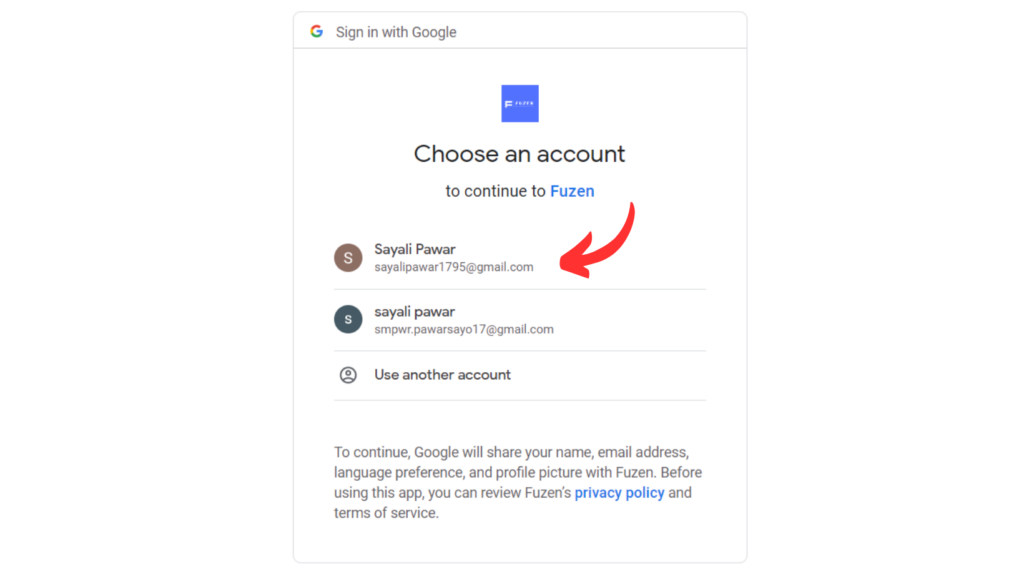
To sign up with google, select the email account you wish to sign up with.
After signing up, you will be redirected to the dashboard page of drip email app.

Signing up using email and password
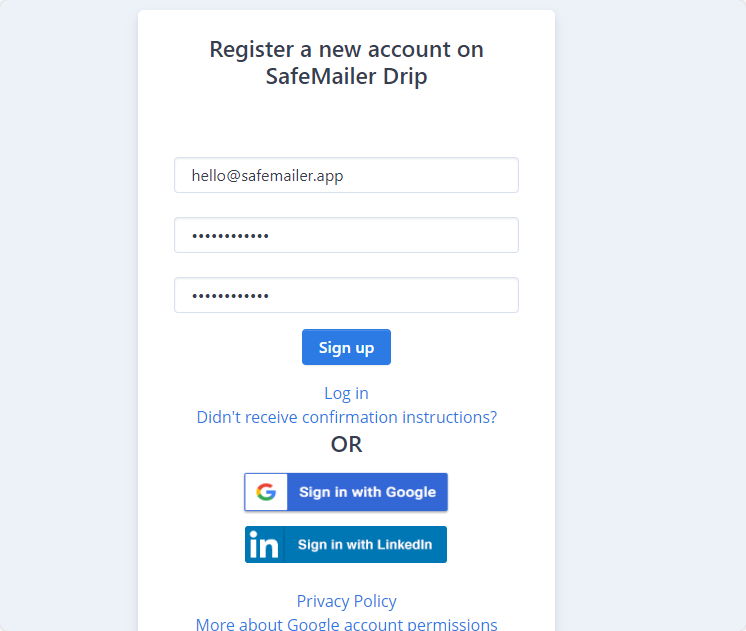
You can also create a new account by signing up if you don’t want to log in through Gmail.
Once you choose to sign up, the following window will appear. Enter your email ID, generate a strong password, and click on the ‘sign up’ button.
Your screen will refresh with a message saying ‘We have sent you a confirmation email.’
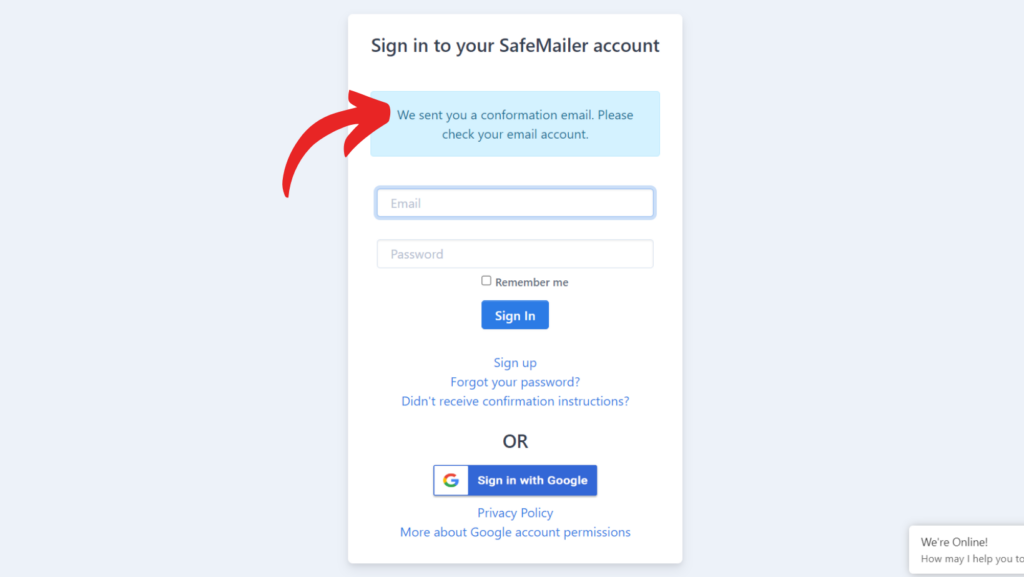
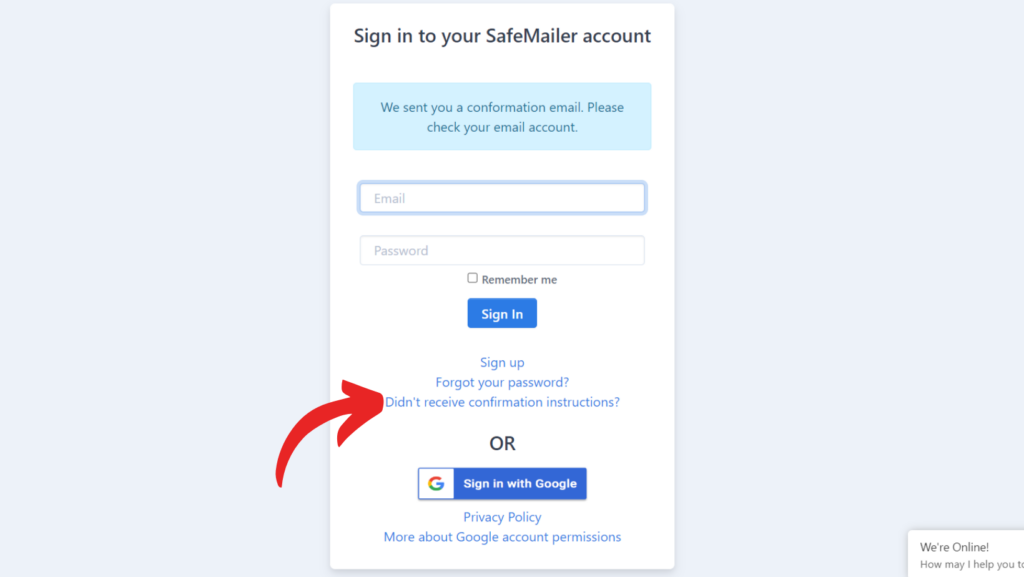
Check your inbox and in case you haven’t received any confirmation email within 2 minutes click on the ‘didn’t receive confirmation instructions’ option.
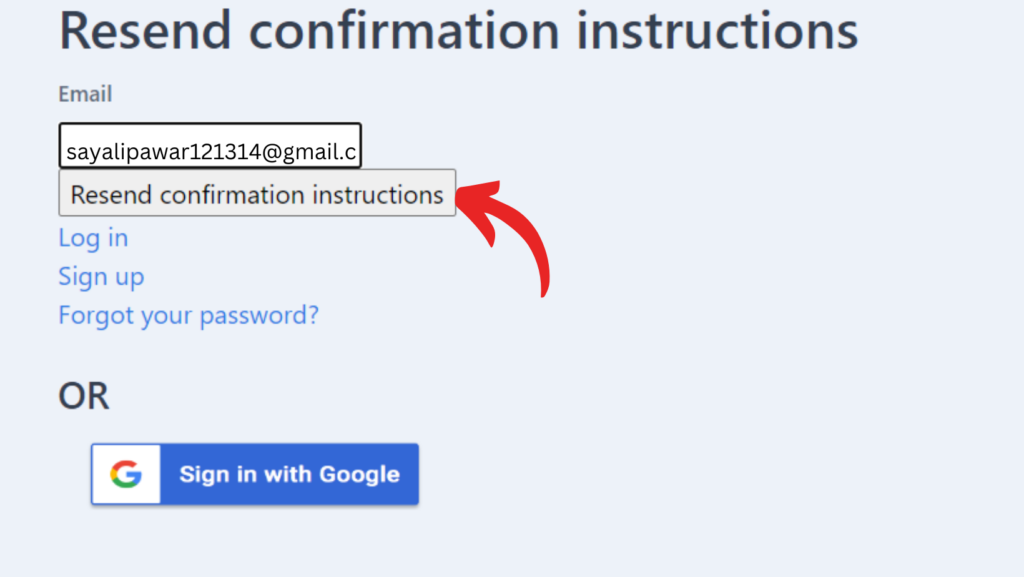
The following window will appear. Enter the email ID you used while signing up and click on the ‘resend confirmation instructions’ button.
You will receive the following email.
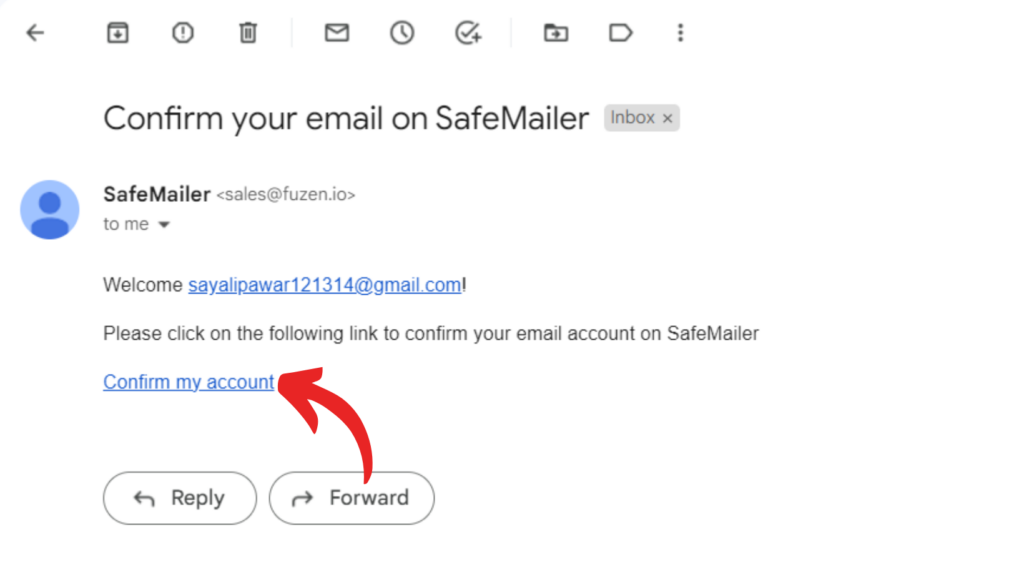
Click on ‘confirm my account’ and you will be redirected to the ‘sign in’ window. Now you can successfully sign in with your email and password.
Drip Email Dashboard
Once you have successfully signed in, you will be taken to the central dashboard within the cold drip email automation app.
You can add multiple recipients, create sequences and add emails to the sequences. At the left side of the dashboard, you will also see a few resources to get you started, including shortcuts to these user guides and demo requests.
You can next add new recipients and assign the sequence from this dashboard.


