Cold emails are much more effective when they are personalized. SafeMailer’s cold email outreach tool will not only automate your cold email campaigns, but also help you send highly personalized email to make them more engaging.
Let’s look at how you can use your audience data to personalize each and every cold email.
Table of content
1. Adding personal data attributes to mailing lists
2. Adding personalization tags to email template
3. Add Unsubscribe link
Adding personal data attributes to mailing lists #
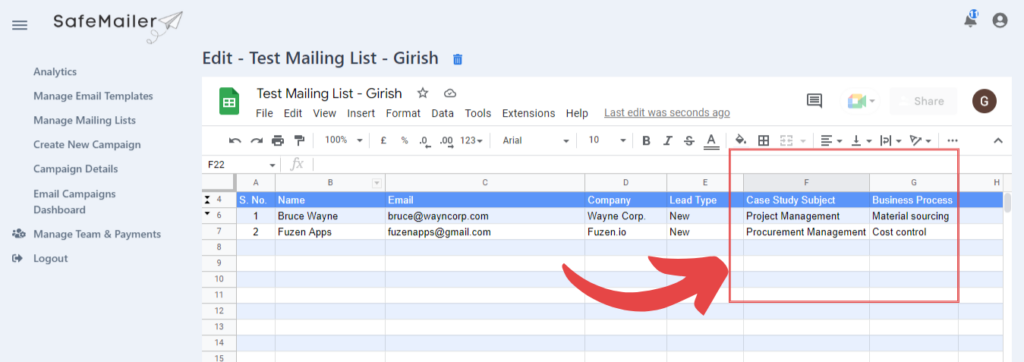
When you create your mailing list on SafeMailer or import a CSV file, the basic data of your audience – email, name, company, etc. will be added to a Google Spreadsheet and you can use that data to personalize your emails, by adding tags like – #Name#, #Company# to your email templates.
Note: If you import a CSV file, make sure that the first column of the file contains a list of emails. Also, if you want the recipient’s name to be imported, make sure to add the company name as well.
But you can also further personalize your emails by adding multiple new columns and giving them appropriate titles. For example – Case Study Subject, Business Process, Address, City, State, etc.

The data from these new columns can also be used to personalize your emails. Let’s see how.
Adding personalization tags to email template #
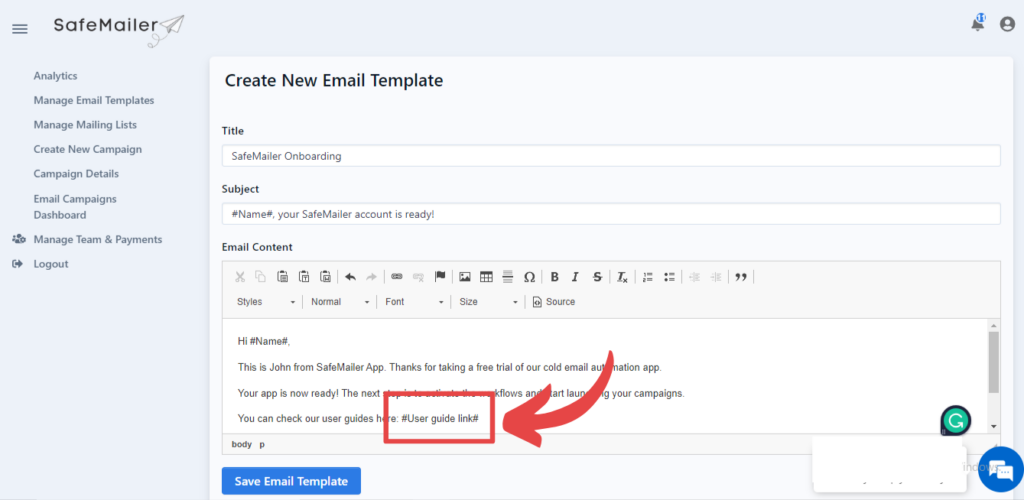
When you create an email template for your campaign in a Google Document, you can personalize your emails by adding personalization tags of the format – #COLUMN_TITLE# at appropriate places.
For example, if a column is titled ‘User guide link’, you can use the data from that column in your emails by adding a tag #User guide link# to your template.

In this fashion, you can add any number of columns to your mailing lists and then add corresponding personalization tags (#COLUMN_TITLE#) to the email templates. This gives you unlimited flexibility to personalize your cold emails and ensure they are engaging.
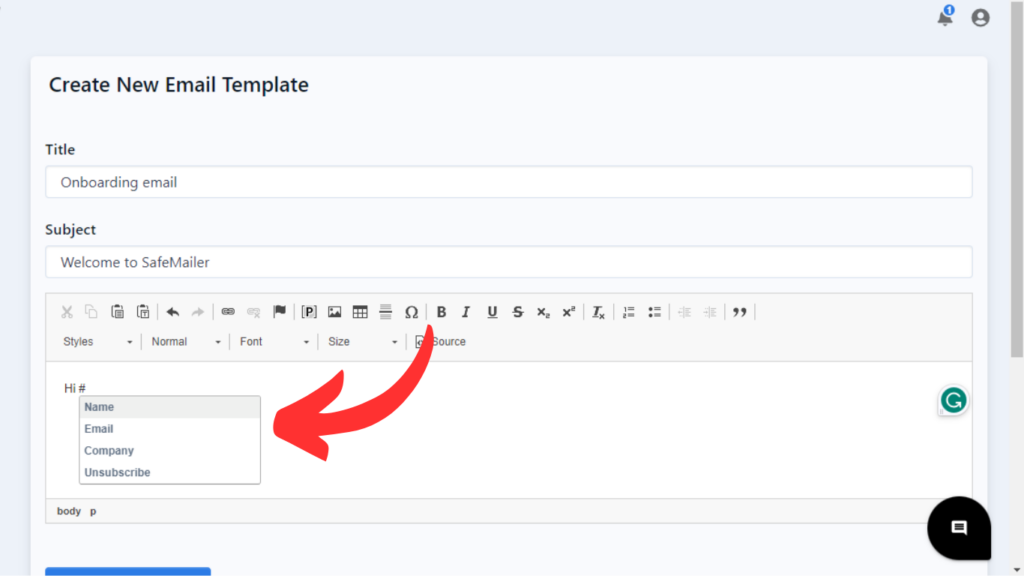
SafeMailer also provides smart selection of frequently used short codes while creating email template. These frequently used short codes include Name, Email, Company and Unsubscribe.

For smart selection of these short codes simply add a “#” after which a drop-down with frequently used short code will be visible. You can select and add any required short codes by simply clicking on it.
Add Unsubscribe link #
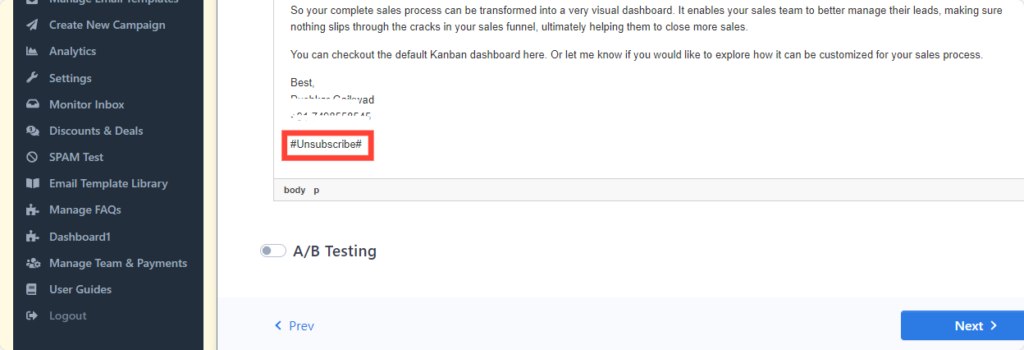
To add an unsubscribe line, you’ll have to add a short code #Unsubscribe# at the bottom of your email content.

The short code will get replaced by the unsubscribe link when emails are sent to your recipients.


